TODO: Overview of all the frames with links to the detail pages for the frames
VoxelShop is based on frames and complementary tools to provide the best usage experience.
Frames are related to:
- 2D and 3D Viewing/Editing
- Color management
- Shortcuts management
Axis Views
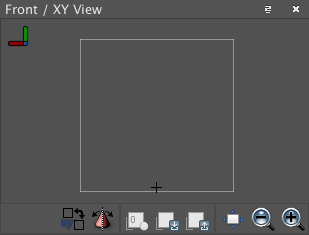
VoxelShop provides 3 views for the main 3D axis: - Front - XY View - Top - XZ View - Left - YZ View
Each view shows one slice of your model in the corresponding axis.
You can change the plane level with  and
and  to respectively going forward or backward.
You can reset the plane to the origin one with
to respectively going forward or backward.
You can reset the plane to the origin one with  .
.
You can pedestal and truck the camera by pressing CTRL and dragging the mouse.
To reset the view you can click on  .
Zoom In / Zoom Out can be done also with
.
Zoom In / Zoom Out can be done also with  and
and  .
.
To show a specific plane in this view you can select the camera tool, press shift and click a voxel in the 3D View that is in the plane that you want to display.
When working in this window the position and plane are highlighted in the 3D View. You can align the 3D view with the current plane with  .
.
During edition it could be necessary to have the plane view maximized. You can then switch with the 3D view with  /
/ /
/ . The current plane view is replaced by the 3D one.
During manipulation, the 3D cursor location is displayed in the right up corner of the view. This provides the 3D location where you can create/remove voxel.
3D View
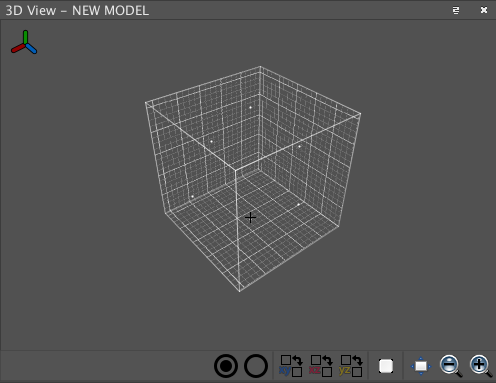
This sub-window shows your creation as a whole and can be used to intuitively change voxels. The coordinate axis in the top left corner shows the current orientation of the voxel object.
During manipulation, the 3D cursor location is displayed in the right up corner of the view. This provides the 3D location where you can create/remove voxel.
Manipulation
You can rotate the camera around the current rotation center by left clicking the background (or holding CTRL) and dragging the mouse. Using the right click instead will pedestal and truck the camera.
 Reset the camera position for this sub-window.
Zoom In / Zoom Out can be done also with  and
and  .
.
Note: Alternatively you can use the mouse wheel.
Optimisation
 will activate a flag to draw the wireframe of the object. This is useful for detecting holes in your creation.
Note: A voxel object is optimized if it is filled with voxels!
 allows to fill any caves in your Voxel model with Voxel. Rendering only the hull can be more efficient for the graphic engine. Works across Layers.
 allows to remove any interior Voxel. This will usually result in smaller exported files, however Voxel engines might render the interior. Works across Layers.
View Swapping
Swap the position of this sub-window with the XY View window.
Swap the position of this sub-window with the XZ View window.
Swap the position of this sub-window with the YZ View window.
Color
Multiple frames are related to color definition and management. You can find details here.
Layers
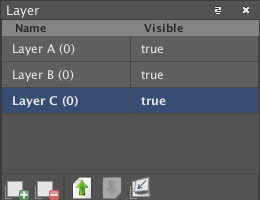
3D model creation is made usually with multiple parts and the process is easier with this separation feature. In VoxelShop, this is called Layer.
You can create multiple layers and restrict tool usage to selected layer.
Layers can be hidden to efficiently work on large projects with many voxels. They furthermore allow for easy modularity. You can conveniently swap parts of existing objects by hiding them and then creating a replacement in a new layer.
Layers can be renamed by double clicking them and their visibility can be changed by clicking the visibility information (right column). A single click onto the layer name will select the layer.
 Merge all visible layers into a new layer.
 Move the currently selected layer one row down.
 Move the currently selected layer one row up.
 Delete the currently selected layer.
 Add a new layer. You can rename layers by double clicking their name.
Shortcut Manager
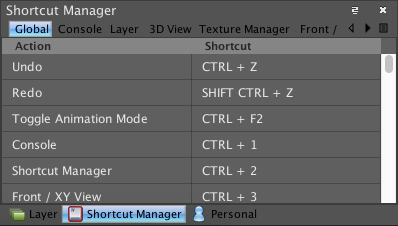
This sub-window allows you to freely bind all your shortcuts. It is organized by sub-window. Shortcuts that always work are listed in the “Global” tab. Shortcuts that only work when the corresponding sub-window is active are listed in their separate tabs.
The shortcuts are not restricted to include modifies, so you can even bind single letters. Shortcuts can be easily changed by double clicking them and then pressing the desired, available shortcut.